> ## Documentation Index
> Fetch the complete documentation index at: https://docs.helpgenie.ai/llms.txt
> Use this file to discover all available pages before exploring further.
# Genie Access
> Manage who can use each of your private Genies — approve or deny access requests, review current users, set access expiry, and see who's scanned your QR codes.
Genie Access is where you control who can use your private Genies. For each Genie you can review people asking for access, manage the users who already have it, and see a record of QR code scans.
You'll find it under **Genie Hub → Genie Access** (`/genie-hub/genie-access`). Access is managed one Genie at a time, so you start by choosing which Genie to work on.
 ## Choosing a Genie
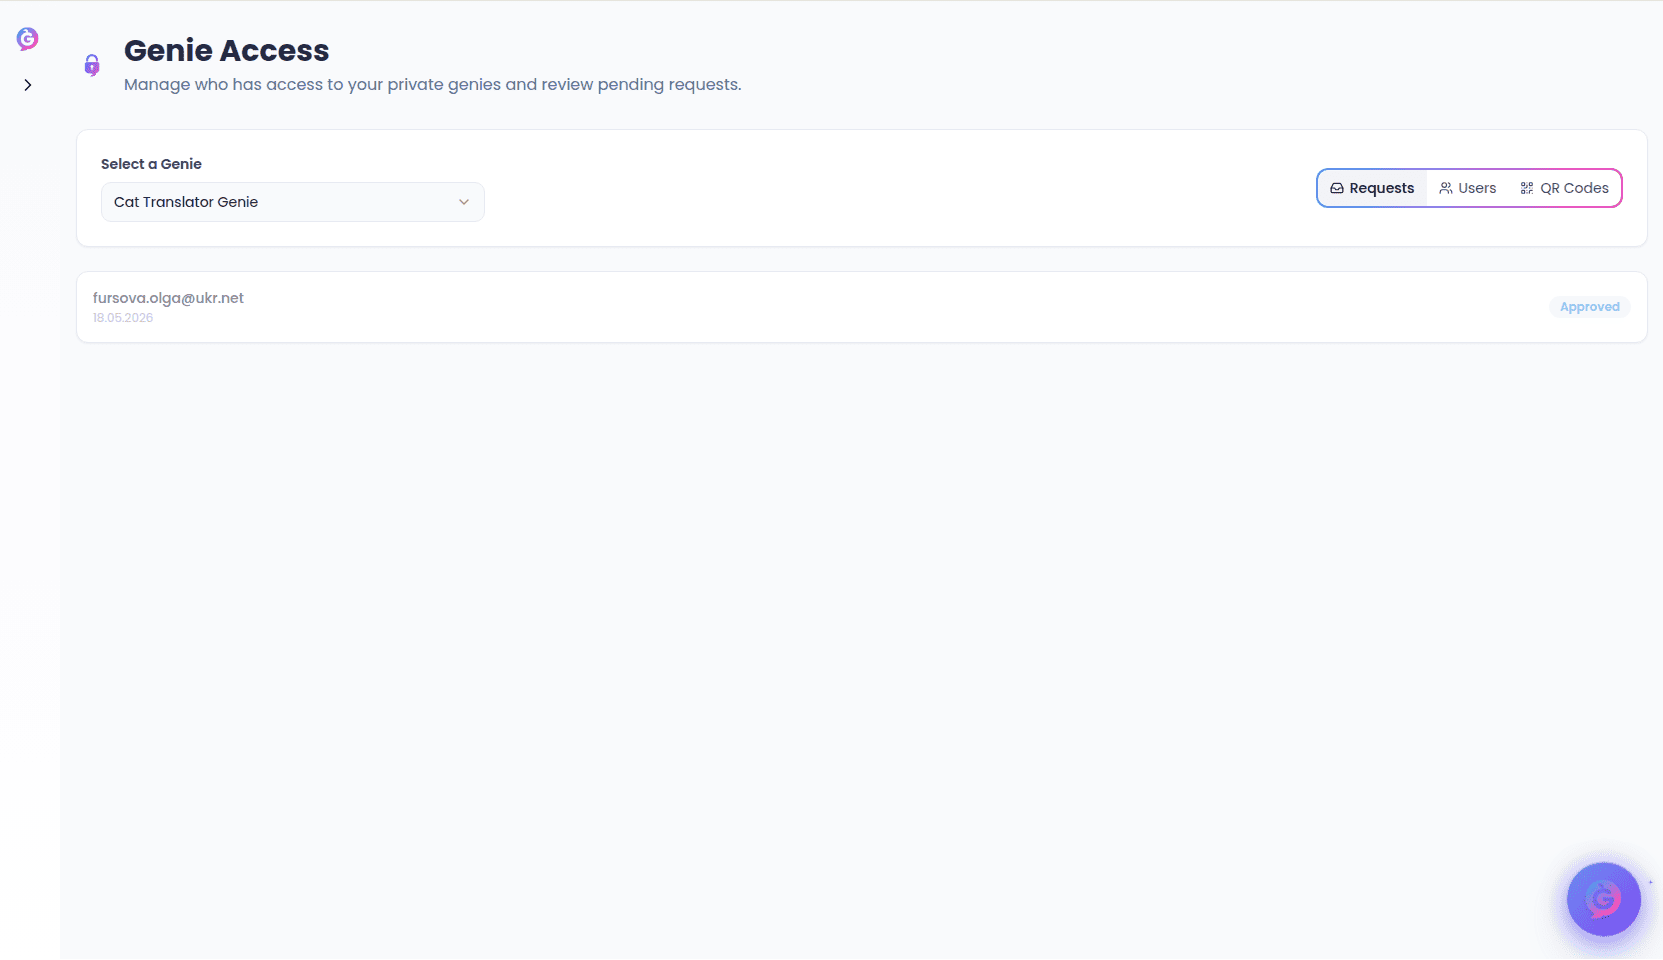
At the top of the page, use the **Select a Genie** dropdown to pick which Genie's access you want to manage. The list shows every Genie you own or have been given access to; Genies that belong to a teammate are marked with a **Team** label.
Until you pick a Genie, the page prompts you to choose one — everything below is specific to the selected Genie. You can switch Genies at any time to manage another.
Once a Genie is selected, three tabs appear: **Requests**, **Users**, and **QR Codes**. The **Requests** tab shows a small badge with the number of pending requests waiting on you.
## Requests
The **Requests** tab lists people who have asked for access to this Genie. It's split into two groups:
* **Pending requests** — each shows the person's email and the date they asked. For each one you can choose **Approve** (grants them access) or **Deny** (turns them down).
* **Resolved requests** — requests you've already handled, shown dimmed with an **Approved** or **Denied** badge and the date you resolved them.
Approving a request adds that person to the **Users** tab for this Genie. If there are no requests for the selected Genie, the tab tells you so.
## Users
The **Users** tab lists everyone who currently has direct access to this Genie. Each person shows their name (or email) and photo where available. Access granted by a teammate is marked with a **Team** badge.
For each user you can:
* **Set or change an access expiry.** Select the expiry field (it shows **No expiry**, a date, or **Expired**) to pick a date after which their access ends. Save the change with the check button, or discard it with the cancel button. To give someone open-ended access again, clear the date before saving. Expired access is flagged in red.
* **Remove access.** Select **Remove** to revoke this person's access to the Genie.
If no one has been granted direct access yet, the tab lets you know.
Expiry is optional. Leave it as **No expiry** for access that doesn't end on its own, or set a date when you only want to grant temporary access.
## QR Codes
The **QR Codes** tab shows a record of every time someone scanned one of this Genie's QR codes to reach it. Each entry lists what was scanned along with details captured at the time, which may include the device, platform, timezone, approximate location, and the email of the person who scanned it, plus the date and time.
Use this to see how your printed and shared QR codes are being used. If no scans have been recorded for the selected Genie, the tab says so.
## Related
* [Activation](/activation) — create the QR codes, smart links, and print materials that people scan and use to reach your Genie.
* [My Genies](/my-genies-list) — where you set a Genie to public or private and manage everything else about it.
## Choosing a Genie
At the top of the page, use the **Select a Genie** dropdown to pick which Genie's access you want to manage. The list shows every Genie you own or have been given access to; Genies that belong to a teammate are marked with a **Team** label.
Until you pick a Genie, the page prompts you to choose one — everything below is specific to the selected Genie. You can switch Genies at any time to manage another.
Once a Genie is selected, three tabs appear: **Requests**, **Users**, and **QR Codes**. The **Requests** tab shows a small badge with the number of pending requests waiting on you.
## Requests
The **Requests** tab lists people who have asked for access to this Genie. It's split into two groups:
* **Pending requests** — each shows the person's email and the date they asked. For each one you can choose **Approve** (grants them access) or **Deny** (turns them down).
* **Resolved requests** — requests you've already handled, shown dimmed with an **Approved** or **Denied** badge and the date you resolved them.
Approving a request adds that person to the **Users** tab for this Genie. If there are no requests for the selected Genie, the tab tells you so.
## Users
The **Users** tab lists everyone who currently has direct access to this Genie. Each person shows their name (or email) and photo where available. Access granted by a teammate is marked with a **Team** badge.
For each user you can:
* **Set or change an access expiry.** Select the expiry field (it shows **No expiry**, a date, or **Expired**) to pick a date after which their access ends. Save the change with the check button, or discard it with the cancel button. To give someone open-ended access again, clear the date before saving. Expired access is flagged in red.
* **Remove access.** Select **Remove** to revoke this person's access to the Genie.
If no one has been granted direct access yet, the tab lets you know.
Expiry is optional. Leave it as **No expiry** for access that doesn't end on its own, or set a date when you only want to grant temporary access.
## QR Codes
The **QR Codes** tab shows a record of every time someone scanned one of this Genie's QR codes to reach it. Each entry lists what was scanned along with details captured at the time, which may include the device, platform, timezone, approximate location, and the email of the person who scanned it, plus the date and time.
Use this to see how your printed and shared QR codes are being used. If no scans have been recorded for the selected Genie, the tab says so.
## Related
* [Activation](/activation) — create the QR codes, smart links, and print materials that people scan and use to reach your Genie.
* [My Genies](/my-genies-list) — where you set a Genie to public or private and manage everything else about it.