

/genie-hub/email-templates).
The three report types
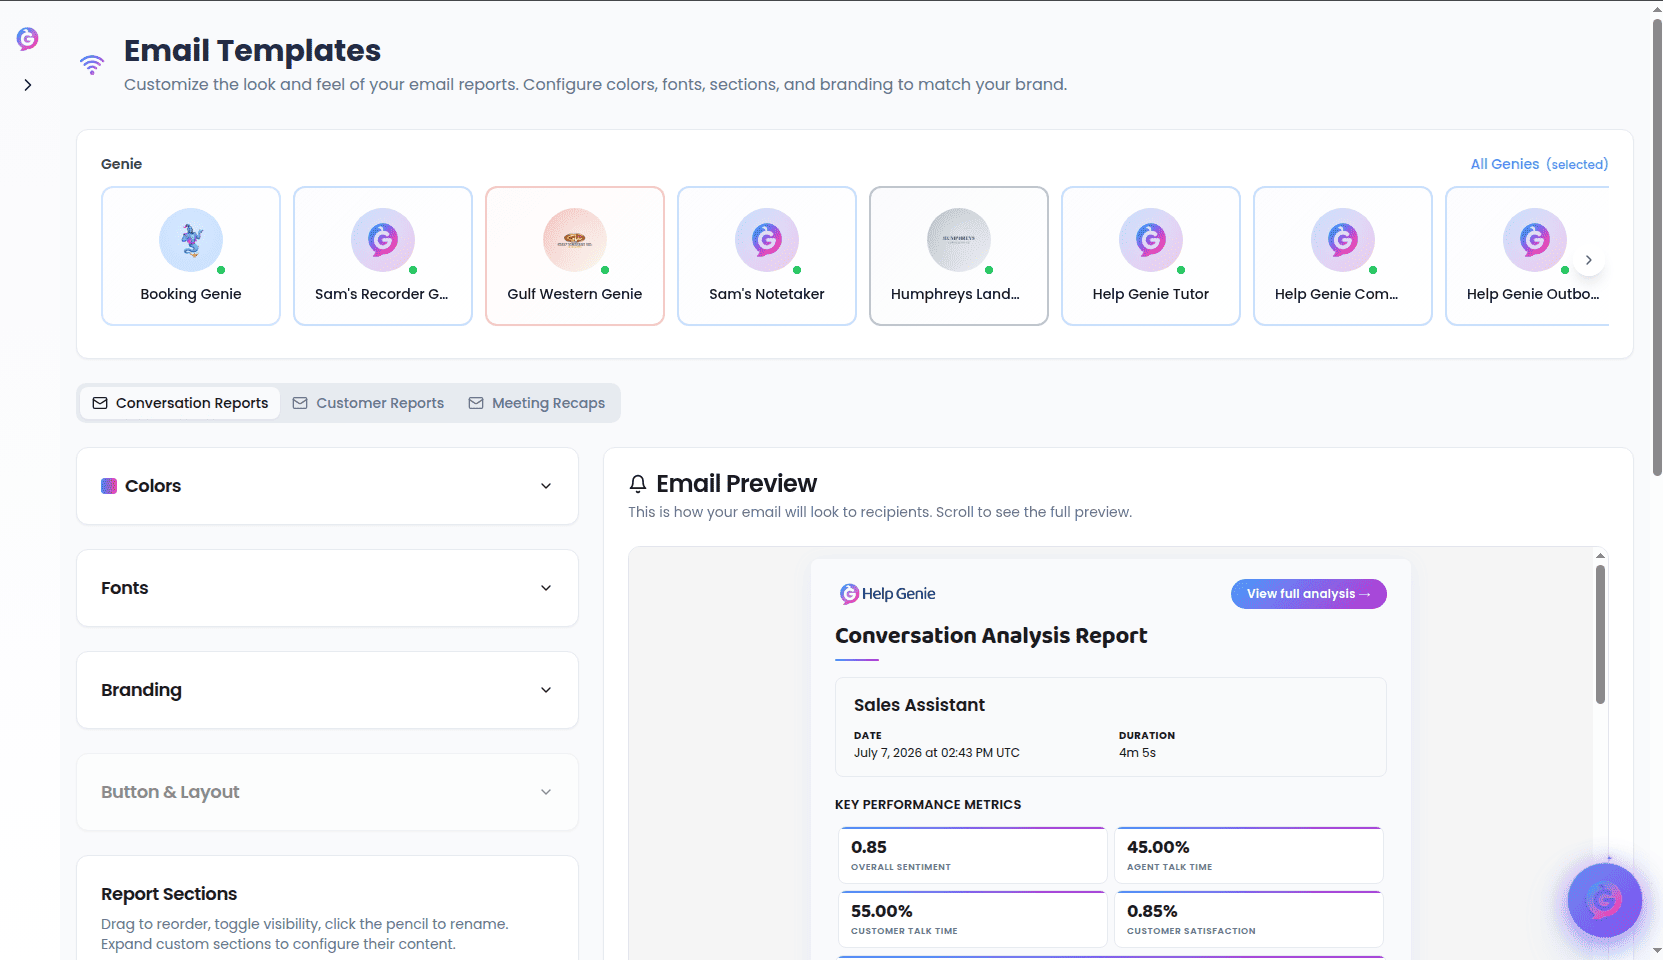
At the top of the page, a set of tabs lets you style each kind of report email separately:- Conversation Reports — the analysis email sent after a conversation, with metrics, topics, insights, and the transcript.
- Customer Reports — the recap email sent to a customer, with key takeaways, highlights, and useful links.
- Meeting Recaps — the follow-up email after a meeting, with attendees, decisions, and an action plan.
Choosing which Genie a template applies to
Just below the header is a Genie selector. It controls whose template you’re editing:- All Genies (the default) — edits the template used by every Genie that doesn’t have its own customization.
- A specific Genie — pick a Genie to give it a template of its own, overriding the shared one.
The editing layout
The page is split into two columns:- On the left, a stack of collapsible settings sections (Colors, Fonts, Branding, Button & Layout, Report Sections) plus the action buttons.
- On the right, a live Email Preview showing exactly how the email will look to recipients. It updates as you make changes — scroll inside it to see the full email.
Colors
The Colors section controls the palette of the email:
For each color you can use the color picker or type a hex value (for example
#4E9CFF).
If you’ve selected a specific Genie that already has brand colors, a Colors from [Genie] panel appears at the top of this section with its brand swatches. Click any swatch to apply it as your Primary color.
- Contrast protection — if your text color would be hard to read against the background, it’s automatically nudged to keep it legible, and a ⚠ Low contrast warning appears when needed.
- Generate a tint — next to Section Background, the Primary and Accent buttons generate a soft, light version of that color to use as the section tint.
Fonts
The Fonts section sets the typeface and heading size:- Font — choose from a curated list of web fonts (Poppins is the default).
- Heading Size — the size of headings in pixels, from 16 to 64 (default 32).
Branding
The Branding section handles your logo and identity:- Apply branding in one click — when a Genie (or, for All Genies, your team) has branding set up, a preview card shows its logo and colors with an Apply button that copies those into the template. If there’s no branding configured, the card says so.
- Logo — shows the current logo. Use Change Logo to upload an image or paste a direct image URL (PNG, JPG, or SVG). If you’ve set a custom logo, Reset to Default restores the standard Help Genie logo.
- Company Name — the name shown in the email.
- Applied Colors — a read-only summary of the current Primary, Accent, Text, and Background colors. Edit these in the Colors section above.
Button & Layout
These options control the shape and styling of visual elements in the email:- Border Radius — corner rounding for cards, sections, and containers, from 0 to 24 px (default 8).
- Button Style — Rounded, Square, or Pill for the call-to-action button.
- Enable Shadow — adds a soft shadow around the main container.
- Button Text — the label on the call-to-action button (default View Full Report).
Button & Layout options only apply when the selected Genie has a follow-up link (redirect URL) configured. If it doesn’t, this section is greyed out with a reminder.
Report Sections
The Report Sections editor controls which blocks appear in the email and in what order. Each report type comes with its own built-in blocks — for example a Conversation Report includes metrics, topics, insights, and the transcript. For every section you can:- Reorder — drag the grip handle to move a section up or down.
- Show or hide — use the toggle on the right.
- Rename — click the pencil to give a section a custom label (the original name stays visible in brackets for reference).
Adding your own sections
Use Add Section to insert custom blocks. You can add up to 10 custom sections:- Text Section — a custom heading and body text, with left/center/right alignment.
- Call to Action — a clickable button with your own text and URL.
- Divider — a horizontal line separator.
- Image — an image from an upload or URL, with alt text, a max width, and alignment.
Saving and resetting
At the bottom of the settings column:- Save Configuration — saves the current template for the selected Genie (or for All Genies).
- Clone from Default — starts from a fresh copy of the standard template for this report type. If a specific Genie is selected, its branding is applied to the copy automatically. You’ll be asked to confirm first.
- Reset to Defaults — reverts the settings on screen back to the built-in defaults.
Changes aren’t applied to outgoing emails until you select Save Configuration. Clone and Reset only change what’s shown in the editor and preview.