

/genie-hub/portals). The list page is where you create, search, reorder, and remove portals; selecting Edit Portal opens a portal’s own page where you configure its genies, branding, and settings.
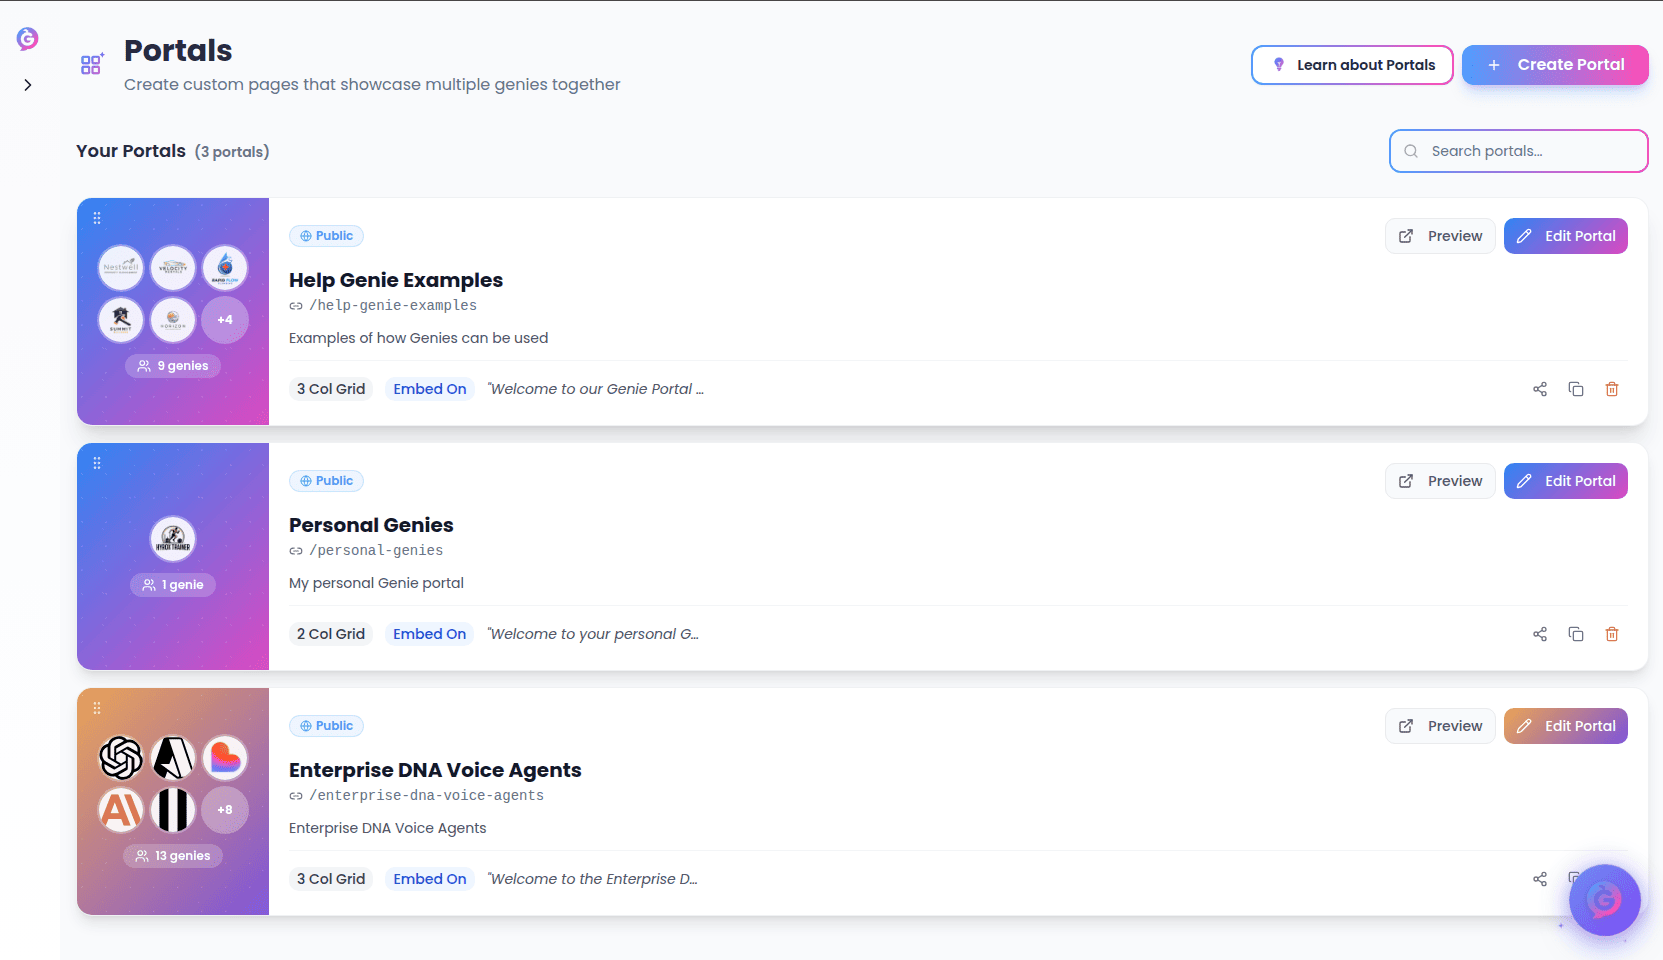
The list page
Across the top you’ll see:- A Portals heading with a short subtitle.
- Learn more — a quick link to guidance for this area.
- Create Portal — starts a new portal (see Creating a portal).
Searching
Type in the Search portals… box to filter the list as you go. Search matches a portal’s name, description, and URL slug. If nothing matches, you’ll see a “No portals found” message with a Clear search button to reset.What each portal card shows
Each card has a branded panel on the left and details on the right:- The panel previews up to five of the portal’s genie avatars (with a +N chip when there are more), plus a chip showing the total genie count. If the portal has no genies yet, it shows the portal’s logo or its first initial instead.
- Status badges — Public (public and active), Inactive, or Private, plus a Protected badge when the portal is password protected.
- The portal’s name and its /slug.
- The description, when one is set.
- Quick facts along the bottom: the grid column count (for example, 3 Col Grid), an Embed On tag when embedding is allowed, and the welcome message, when set.
- Preview — opens the live portal in a new tab.
- Edit Portal — opens the portal’s own page.
- Copy link and Copy embed code icons — copy the portal’s share link or embed snippet to your clipboard.
- Delete (trash icon) — removes the portal (see Deleting a portal).
Reordering
Drag any card by its grip handle (top-left of the branded panel) to change the order your portals appear in. The new order is saved automatically.Reordering is turned off while a search term is active — clear the search to drag portals again.
Deleting a portal
Selecting the trash icon opens a confirmation dialog. Deleting a portal can’t be undone, but the genies inside it are not deleted — only the portal page is removed. Confirm with Delete or back out with Cancel.Creating a portal
Create Portal opens a side panel where you set up the basics:- Portal Name (required) — shown at the top of your portal page.
- Description — a short summary of what the portal offers.
- Welcome Message — greeting shown to visitors when they land on the portal.
- Branding (optional, collapsible) — by default a new portal uses your account branding. You can turn that off to set a custom Primary Color, Secondary Color, and Enable Gradient just for this portal. More branding options are available after the portal is created.
Account branding is only available once you’ve set up brand colors and a logo in Account Settings. Until then, the account-branding option is unavailable and new portals use default colors.
Editing a portal
A portal’s own page (/genie-hub/portals/:portalId) is where you manage everything about it. Use Back to Portals to return to the list.
At the top you’ll see the portal’s name, its /portal/slug, and badges for Active/Inactive and Public status, plus three quick actions:
- Preview Portal — opens the live portal in a new tab.
- Copy Link — copies the portal’s public link.
- Save Changes — saves edits made in any of the sections below.
Changes you make in the sections below are applied when you select Save Changes.
Portal details
Configure the portal’s Name, URL Slug, Description, and Welcome Message. The slug is the last part of the portal’s web address (/portal/your-slug); it’s automatically tidied into lowercase words separated by hyphens.
Layout & visibility
- Grid Columns — how many columns of genies the portal shows: 2, 3, or 4.
- Active — when on, the portal is accessible to visitors; turn it off to take it offline.
- Public — when on, anyone with the link can view the portal.
Branding
Choose how the portal looks:- Use Account Branding — inherit the colors and logo from your account settings. When this is on, a preview shows the account colors and logo that will be used.
- Turn it off to set custom branding for this portal only, using the branding editor. A Reset to Account button restores the account colors at any time.
Genies
This is where you choose which genies appear on the portal.- In This Portal lists the genies already added, with a count. Drag any genie by its grip handle to reorder how they appear on the portal, or use the trash icon to remove one. A Featured badge marks any genie set as featured.
- Available Genies shows the rest of your genies as a grid of avatars. Use the Search genies… box to narrow it down, then select a genie to add it to the portal. Genies already in the portal don’t appear here; once every genie has been added, a note tells you so.
Removing a genie only takes it off this portal — the genie itself is not deleted and stays available in My Genies.
Share & embed
- Portal Link — your portal’s public address, with a button to copy it.
- Embed Code — Copy Embed Code copies a snippet you can paste into your own website to embed the portal.