

/genie-hub/my-genies). Selecting a Genie opens its configuration screen; see Identity, voice & prompts to start.
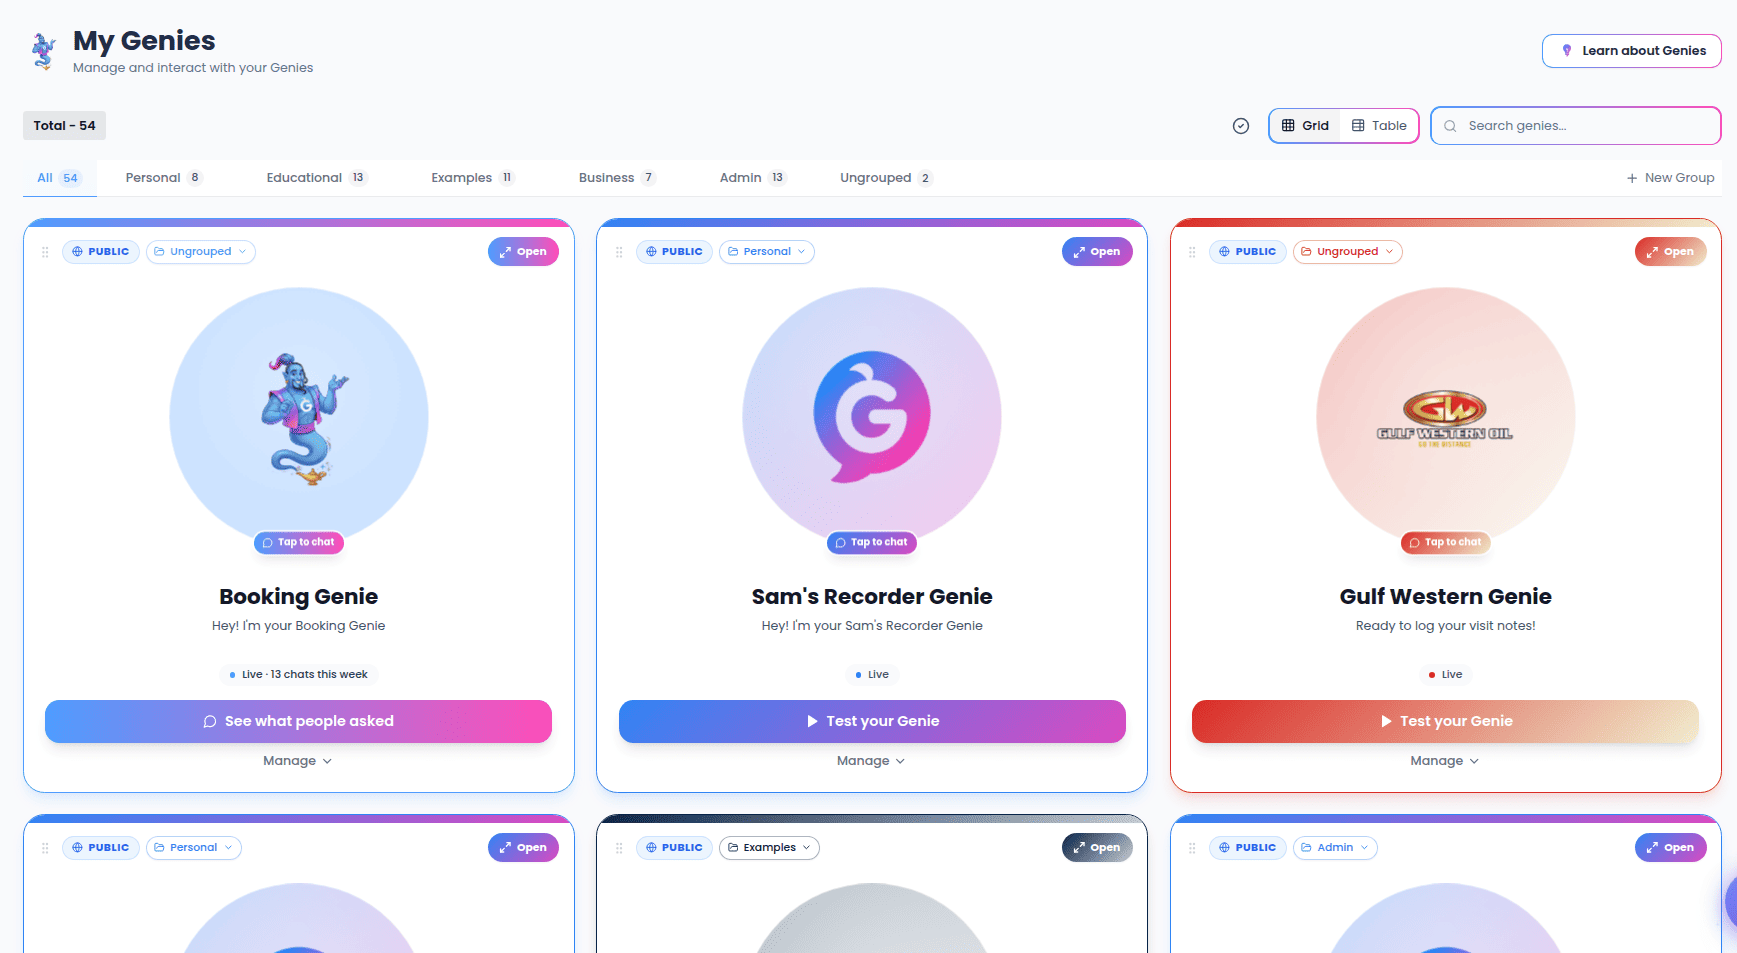
The page at a glance
Across the top you’ll see:- My Genies heading with a short subtitle.
- A Genie limit banner (only when you’ve hit your plan’s cap) showing how many Genies you’ve used and an Upgrade button. See When you reach your limit.
- Learn more — a quick link to guidance for this area.
Ownership filter
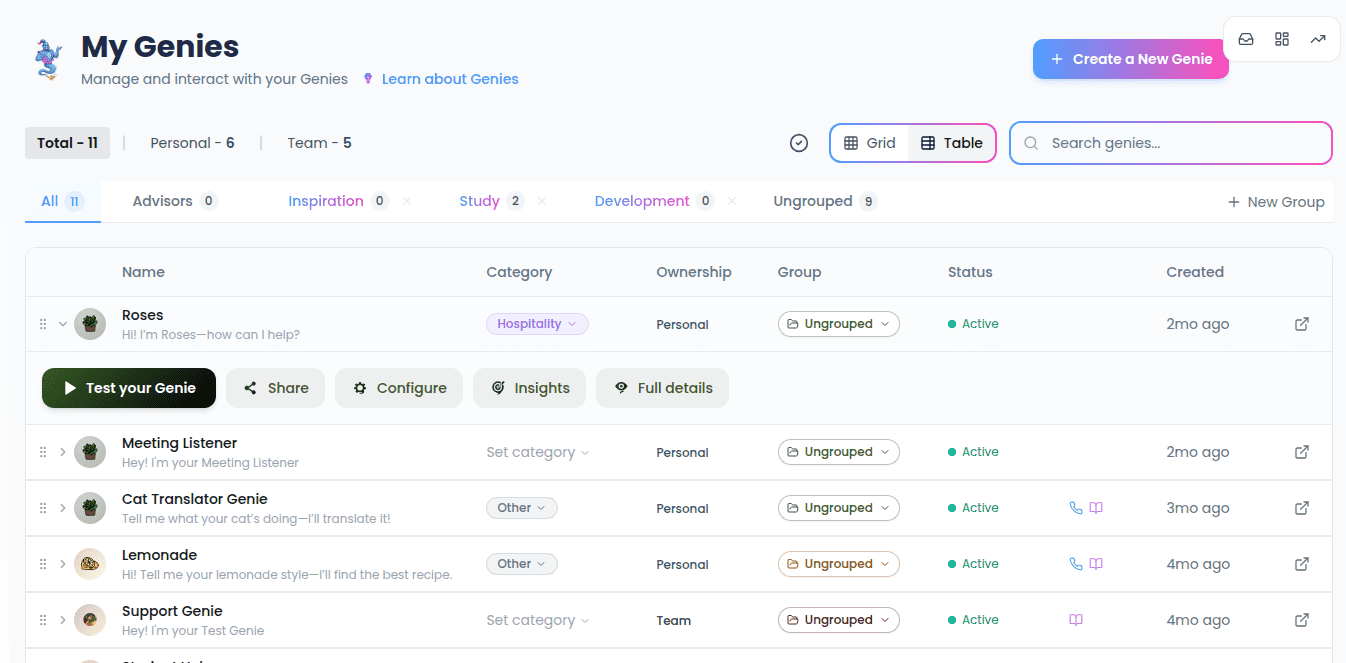
When one or more of your Genies belongs to a teammate, a count bar appears with three filters:- Total — every Genie you can see.
- Personal — only Genies you own.
- Team — Genies owned by other members of your team that you’ve been given access to.
Searching
Use the Search genies… box to filter the list as you type. Search matches a Genie’s name, description, welcome message, and category. If nothing matches, you’ll see a “No genies found” message with a Clear search link to reset.Grid and table views
A view toggle switches between two layouts, and your choice is remembered for next time:
- Grid — a card per Genie, showing its avatar, name, status, and quick actions.
- Table — a compact row per Genie with columns for Name, Category, Ownership (Personal/Team), Group, Status (active or inactive), feature icons (a phone number is attached, knowledge is attached), and when it was Created.
What each Genie card shows
In grid view, each card adapts to the Genie’s state:- A Public or Private badge, and a Team badge for Genies owned by others.
- A Voice or Listener type badge, showing which kind of Genie it is.
- A status pill: Inactive, Live, Live · Ready to share, or Live · N chats this week (conversations in the last 7 days).
- Open to enter the Genie’s configuration screen, and tapping the avatar opens the live Genie to chat or preview.
- One adaptive primary button that reflects what to do next — Test your Genie (inactive), See what people asked (live with recent chats), or Activate this Genie (live but quiet).
- A Manage toggle that expands Share, Configure, Insights, and Full details.
Groups
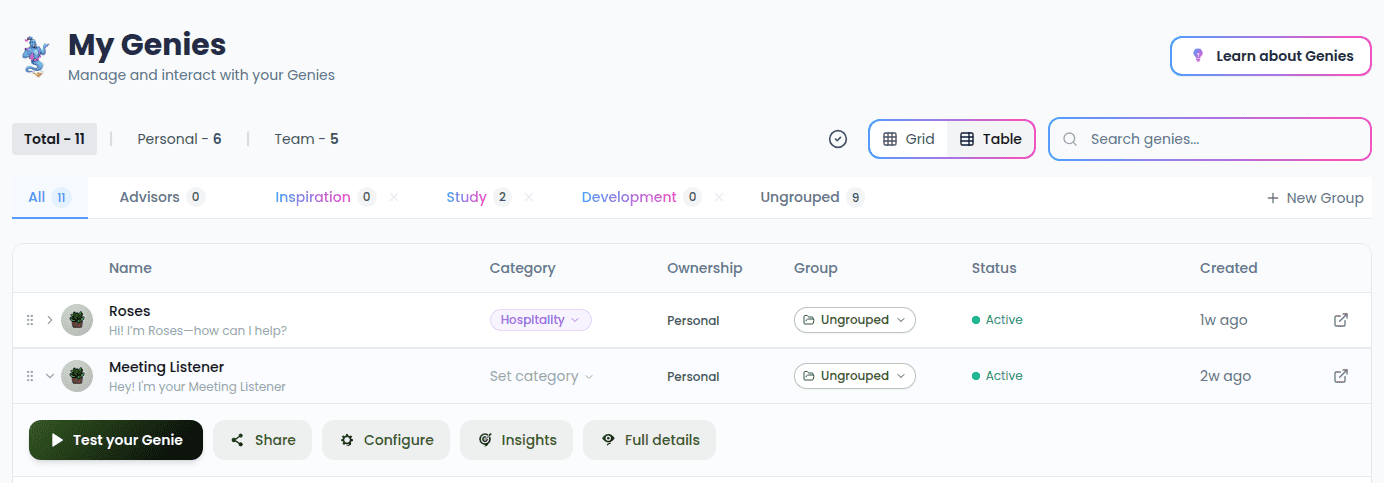
Groups let you organize Genies into named collections. A row of tabs sits above the list:- All and Ungrouped tabs, each with a count, plus a tab for every group you’ve created.
- Select a tab to filter the list to that group.
- Drag group tabs to reorder them.
- Each group tab has an × to delete it — you’ll be asked to confirm, and any Genies inside are moved to Ungrouped (nothing is deleted). Team groups can’t be deleted and are shown with a distinct style.
- New Group opens the group panel.

Creating or editing a group
The group panel lets you set a Group Name (required, up to 50 characters) and an optional Description (up to 200 characters), with live character counters. Save Group is enabled once you’ve entered a name.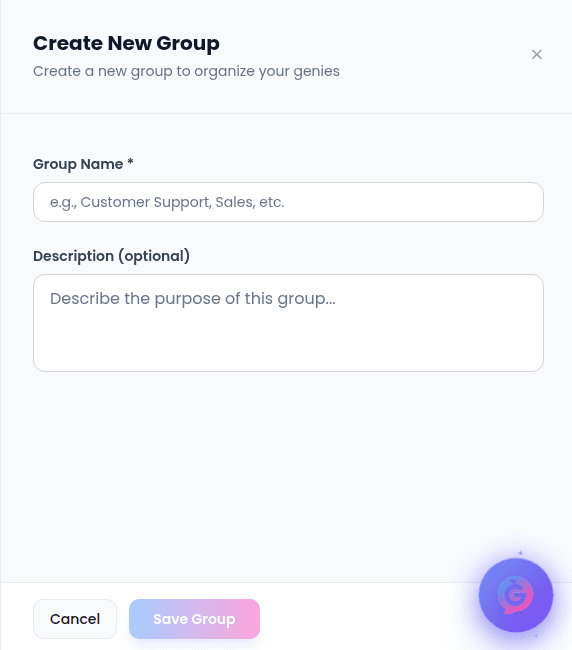
Moving a Genie into a group
Each Genie has a group selector (a small pill showing its current group, or Ungrouped). Open it to pick a group and reassign the Genie. Personal Genies can only join personal groups, and team Genies can only join team groups.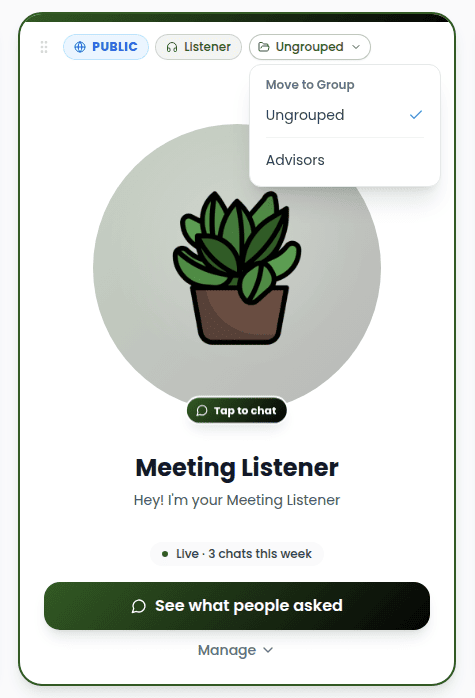
Reordering
Drag any Genie card (grid) or row (table) using its grip handle to change the order they appear in. Your new order is saved automatically.Reordering is turned off while a search term is active — clear the search to drag Genies again.
Creating a new Genie
- The Unlock your next genie card at the bottom of the list starts a new setup. See Setting Up a Genie.
- The Unfinished setups button (a checkmark icon in the controls bar) takes you to Genies whose setup you haven’t finished.
- If you have no Genies yet, an empty state offers Create Your First Genie.
When you reach your limit
Your plan includes a maximum number of Genies. When you reach it:- A Genie limit reached banner appears at the top with your current count and an Upgrade button.
- An upgrade card replaces the “create” prompt, showing how many Genies you’ve used and the benefits of upgrading (unlimited Genies, advanced customization, priority support and analytics).
- Upgrade to Premium takes you to the pricing page.