

/genie-hub/voice-playground). The page opens on a curated set of voices so you have somewhere to start straight away.
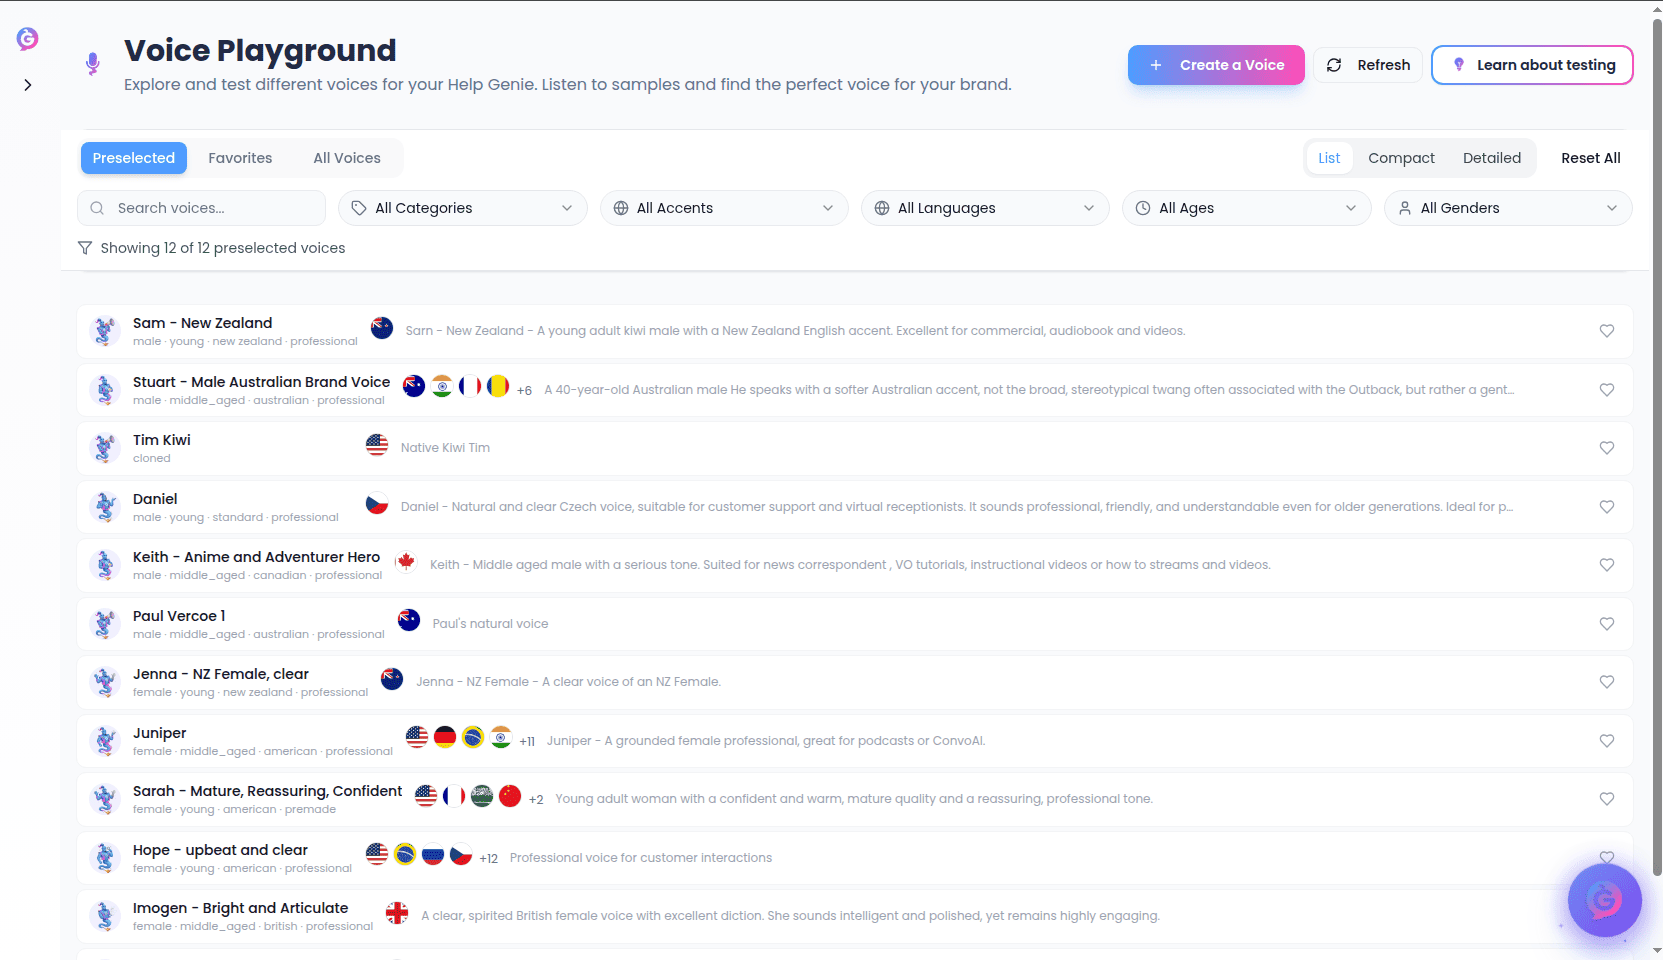
The header
Across the top you’ll see:- A Voice Playground heading with a short subtitle.
- Create a Voice — opens the voice creation panel (see Creating a voice).
- Refresh — reloads the voice catalog so any newly created voices show up.
- Learn more — a quick link to guidance for this area.
Browsing voices
Voices are organized into tabs:- Preselected — a curated shortlist of recommended voices. This is what you see when you first open the page.
- Favorites — voices you’ve saved for quick access. See the note under Favoriting voices — this feature is not yet available.
- All Voices — the full catalog of over 2,000 voices, loaded a page at a time. A small spinner shows on the tab while more are loading.
Choosing how voices are displayed
Use the view switcher (top right of the filter bar) to change the layout:- List — a dense, single-line row per voice. Best for scanning many voices quickly.
- Compact — small cards in a grid.
- Detailed — larger cards showing the full description, labels, and the voice’s verified languages.
Filtering and searching
The filter bar lets you narrow the list:- Search voices… — type to filter by name as you go.
- Category, Accent, Language, Age, and Gender — pick a value from each dropdown to filter the list. Each defaults to “All”.
On the All Voices tab, filtering and searching run against the full catalog on the server. On the Preselected and Favorites tabs, they filter the voices already on screen.
What each voice shows
Depending on the view, a voice displays:- A genie avatar — in List view, selecting the avatar plays a preview.
- The voice’s name and quick labels: gender, age, accent, and category.
- Language flags for the languages the voice supports.
- A short description of the voice.
Previewing a voice
Select the Play control (or the avatar in List view) to hear a short sample. A spinner shows while the sample is prepared, then it plays automatically. Selecting Play again on the same voice stops playback, and starting another voice stops the first.Testing a voice on your own text
Select Try Text on any voice to open the Try this voice panel. From there you can:- Type or edit the sample text (a friendly default is filled in for you).
- Select Generate to create the spoken sample. It plays automatically once ready.
- Use the Play / Pause and Restart controls to replay the sample.
Favoriting voices
Each voice has a heart icon intended for saving voices to your Favorites tab for quick access later.Creating a voice
Select Create a Voice in the header to open the Create a Custom Voice panel. It offers three ways to build a voice, each on its own tab:Voice Design
Describe the voice you want in plain language (tone, gender, accent, personality) and, optionally, sample text for the preview. Select Generate previews to get a few variations, listen to each, tick Use this voice on your favorite, give it a name, and select Create voice. Best when you don’t have any audio to work from.Instant Clone
Create a voice from real recordings. Give it a name, optionally add a description, and upload audio samples.- Upload 1–25 audio files (MP3 or WAV).
- For best results use clear recordings with minimal background noise; 30 seconds to 3 minutes of audio total is recommended.
- Leave Clean up audio automatically ticked if your recordings have background noise.
Voice Remixing
Take a voice you’ve already created and adjust it — make it warmer, more energetic, or shift the accent.- Only voices you’ve created (via Voice Design or Instant Clone) can be remixed. If you don’t have any yet, the tab prompts you to create one first.
- Pick a voice, describe how it should change, and optionally add sample text (at least 100 characters, or leave it blank to have suitable text generated for you). A live counter tells you how many more characters are needed.
- Select Generate remix previews, choose the variation you like, name it, and select Create remix voice.
After a voice is created you’ll see a confirmation, and the panel returns you to the Preselected tab. Use Refresh if a newly created voice doesn’t appear right away.